Why Your Paddle Float Keeps Slipping Off
Paddle float self-rescue has gotten complicated with all the conflicting advice flying around. Buy this brand, use that technique, blame the water temperature — meanwhile you’re standing chest-deep in a lake wondering why your float just slid clean off your blade for the third time. The answer is usually embarrassingly simple. And it won’t cost you $200 to fix.
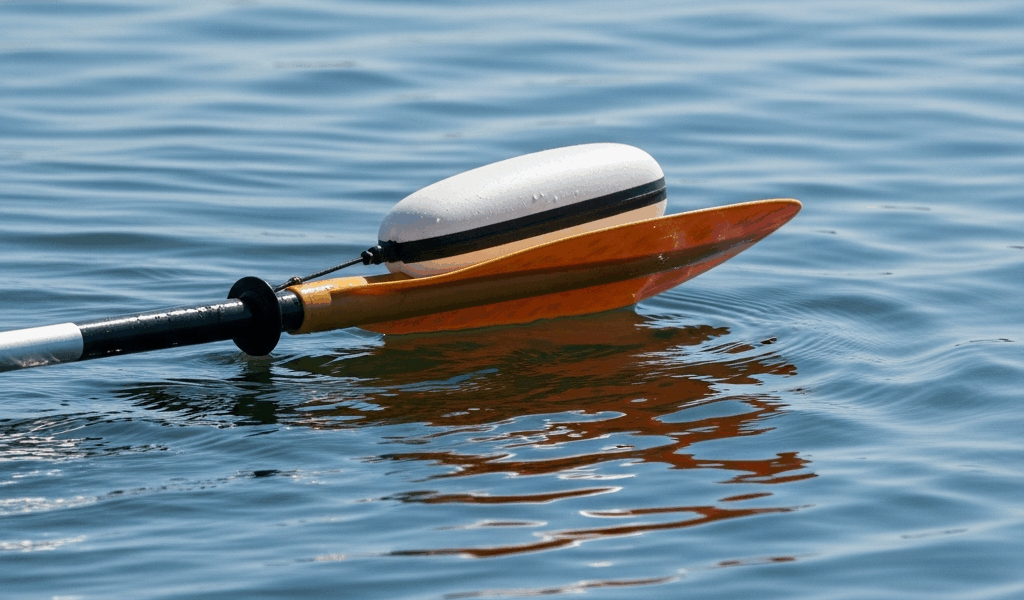
Three things cause this. Almost always. The float bladder has lost pressure or the fabric stretched out over months of use, the float sleeve doesn’t actually match your blade width, or you didn’t inflate it all the way before trying to mount. I’ve done that last one more times than I’ll admit — grabbed a float that looked full enough, hit cold water, and watched it collapse sideways the second any weight touched it.
Check the Fit Before You Fix Anything Else
Probably should have opened with this section, honestly. Most paddlers skip the fit check entirely because they assume paddle floats are universal. They aren’t.
Grab a tape measure. Measure your blade at its widest point. Euro blades — the long rectangular style — sit completely differently inside a float sleeve than teardrop blades do. A float rated for a 7-inch blade will slip off an 8-inch blade every single time without exception. That half-inch gap feels trivial on dry land. In moving water with numb fingers, it’s the difference between a successful self-rescue and a very bad afternoon.
The most common offenders are cheap universal-fit floats from big-box retailers. Designed to fit “most” blades, which functionally means they fit all blades poorly. Pull up the manufacturer specs before doing anything else. If your blade is wider than the float sleeve’s rated range, you’ve already found your problem. A $40 float that doesn’t match your paddle geometry is $40 gone. Don’t make my mistake — measure first, buy second.
Step-by-Step Fixes From Easiest to Most Involved
1. Re-inflate to the correct PSI
Check your valve. Most floats are designed for 2–3 PSI, though some models — the NRS Pro line, for instance — go up to 4 PSI. A partially deflated float loses structural rigidity fast and collapses under any lateral pressure. Here’s the thing: your fingers can’t reliably detect when a float has dropped half a PSI over three weeks of storage. Visually, it looks fine. Performance-wise, it’s garbage. Use an actual gauge.
2. Inspect and replace the velcro or cinch strap
The closure mechanism wears out well before the bladder does. Saltwater kills velcro — after 20 to 30 uses, the hooks flatten and lose grip entirely. If you’re yanking the velcro tight and it’s not holding, that’s why. Replacement adhesive-backed velcro runs about $8 at any hardware store and takes five minutes to apply. Wrap it where the original velcro sat, hook side facing loop side. Press hard. Let it cure a full 24 hours before trusting it on the water.
Some floats use nylon cinch straps instead. Torn strap or cracked buckle means replace the whole assembly — roughly $15 for a quality replacement kit direct from the float manufacturer.
3. Wrap the blade with grip tape for friction
Quick-and-dirty fix, but it works. Friction tape — the non-slip kind you’d find on skateboard decks or dock stairs — adds grip that keeps the float sleeve from sliding around. Wrap two or three bands across the blade width, spaced evenly. This increases effective diameter without touching the float itself. About $6 per roll at any hardware store. Won’t fix a genuine size mismatch, but for a float that’s just slightly loose, it buys you real security.
4. Replace the float sleeve entirely
Stretched fabric, small tears, seam separation — any of these means the sleeve is done. Replacement sleeves run $25–$50 depending on brand. The bladder inside is usually fine. It’s the sleeve doing the actual gripping work. Most arrive within two days from the manufacturer or Amazon. Swapping them out takes about ten minutes.
When Conditions Make It Worse
Cold water is a silent saboteur. I learned this on Puget Sound — February, water temp around 42°F, hands functionally useless within 90 seconds of launching. The same float I’d used all August suddenly felt impossible to secure. Freezing fingers lose dexterity faster than you expect. Practice your float deployment at home, in warm water, with zero pressure. Your muscle memory will carry you when actual conditions make thinking difficult.
Wind torques the float sideways while you’re positioning it. Even a light breeze can rotate the blade just enough to shift the sleeve. Lean away from the wind while mounting. Secure the velcro or strap on the windward side first — gives you a fixed anchor point to work from instead of chasing a spinning blade.
Salt water swells fabric over time. Floats stored in saltwater conditions expand, then crack as they dry. Rinse with fresh water after every ocean session. Let it air dry completely — not partially, completely — before storing. That expansion-contraction cycle is what destroys seams from the inside out.
What to Do If Nothing Fixes It
Checked the fit, re-inflated, replaced the velcro, still slipping — the bladder itself probably has a crack or slow leak. Small punctures aren’t obvious until weight hits the float. Fully inflate it and listen close for hissing. Or submerge it and watch for bubbles. Most bladders can’t be patched cleanly enough to trust in an actual rescue situation. Replacement is the only real answer.
Seam separation where the sleeve meets the bladder is a structural failure. Stitching it yourself buys time, not reliability. Professional repair or replacement sleeve installation runs $30–$60 — worth every dollar compared to a float that fails when you actually need it.
As someone who’s tested floats in genuinely unpleasant conditions, I learned everything there is to know about which ones actually hold. Today, I will share it all with you. But what is a reliable paddle float? In essence, it’s one that stays on your blade under pressure without thinking about it. But it’s much more than that — it’s your only realistic self-rescue option if you capsize alone in open water.
Three floats worth considering: the Braca Breeze runs about $85 and was designed specifically for European paddle geometry — valve quality and strap durability are genuinely excellent. The SeaSense Evolution comes in around $45–$55, budget-friendly with a solid closure that holds up. The NRS Paddle Float Pro is heavier, closer to $65, but it grips like a vice. I’m apparently hard on gear and the NRS works for me while the cheaper universal-fit options never lasted a full season. No sponsorships here. Just floats I’ve used in actual cold water that stayed put.
A slipping paddle float isn’t an inconvenience. It’s a safety failure. Fix it at home, test it in flat calm water, and don’t take it into real conditions until you’d bet your life on it — because eventually, you might.


Stay in the loop
Get the latest seattle paddleboard updates delivered to your inbox.